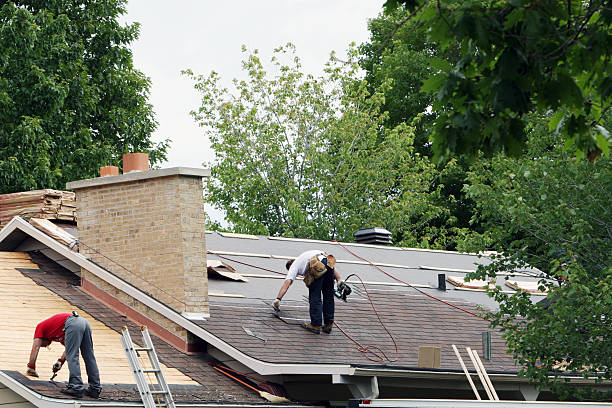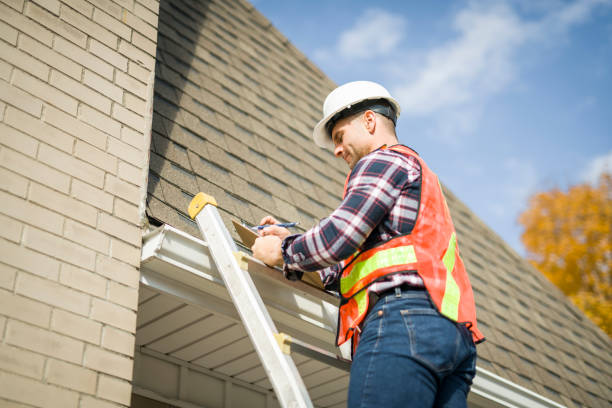
Initial Visual Inspection
Roofing contractors begin with a thorough visual inspection of the roof from both the ground level and on top of the structure. This first step helps identify obvious signs of damage or irregularities, such as:
– Missing or loose shingles
– Sagging areas in the roofline
– Visible cracks or punctures
– Excessive moss or algae growth
Interior Assessment for Hidden Issues
The inside of your home can reveal clues about roof-related structural problems that may not be visible from the exterior. Professionals often inspect:
– Ceilings for water stains or discoloration
– Attics for leaks, mold growth, or daylight seeping through gaps
– Insulation for moisture retention
This step ensures that internal issues are accounted for during the overall assessment process.
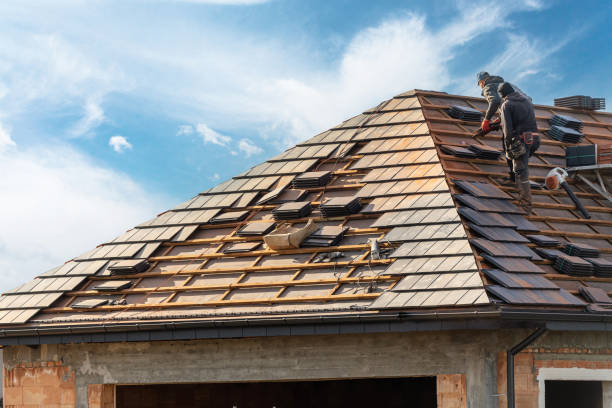
Comprehensive Structural Analysis
To ensure your roofing system is sound, contractors examine all components contributing to its structure. Areas often evaluated include:
– Roof Decking: Checking for warping, rot, or other signs of compromise.
– Flashing: Ensuring flashing around chimneys, vents, and skylights is intact and secure.
– Gutters and Drainage Systems: Confirming proper water flow to mitigate pooling and foundation damage risks.
Contractors also look at the roof trusses and beams supporting the structure to identify potential weaknesses due to age or impact.
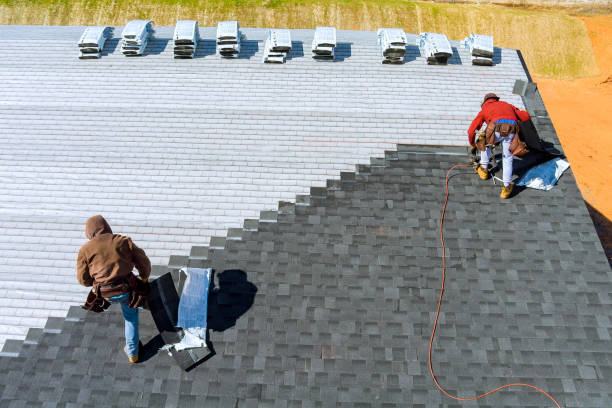
Use of Advanced Tools and Techniques
Modern roofing professionals utilize tools and technology to conduct a more precise evaluation of your roof’s structural condition:
1. Drones – High-resolution cameras on drones allow contractors to access hard-to-reach areas safely while capturing detailed images of potential damage points. 2. Moisture Detectors – These devices help pinpoint areas where water infiltration has occurred beneath shingles or within attic spaces. 3. Infrared Scanning – Infrared thermography detects temperature differences across your roof surface, revealing hidden leaks or insulation problems.
These advanced methods provide accurate data that supports informed decision-making during repairs.
Documentation of Findings
After completing their assessment, professionals typically provide a detailed report outlining their findings. This report includes photographs, measurements, and recommendations for repairs if necessary. A clear breakdown ensures homeowners understand both immediate needs and potential long-term concerns.
| Key Components Checked | Common Issues Identified | Recommended Actions |
| Shingles | Cracks/ Missing pieces | Replacement |
| Flashing | Corrosion/ Loosening | Sealing/ Replacement |
| Gutters | Clogs/ Rust | Cleaning/ Realignment |
| Roof Deck | Rotting/ Warping | Reinforcement/ Partial Rebuild |
Hiring a professional roofing contractor is vital when it comes to assessing structural damage accurately. Their expertise ensures even minor issues are resolved promptly before they develop into costly repairs or safety hazards over time.
Steps a St Paul MN Roofer Takes to Inspect Roof Damage Conditions
Roof inspections are a critical part of maintaining the structural integrity and longevity of any building. Whether it’s a routine check-up or an inspection after severe weather, professional roofing contractors follow a systematic approach to assess and address roof conditions. Below is an outline of the key steps experts take during a roof inspection for damage.
Initial Visual Inspection
- Missing or damaged shingles: Curling, cracking, or missing shingles are easily visible and often indicate wear and tear or storm damage.
- Sagging areas: Structural inconsistencies, such as sagging sections of the roofline, can suggest underlying damage to the framing or decking materials.
- Gutter condition: Inspectors check for debris-filled gutters or granule buildup from shingles, which may signal aging roof materials.
- Flashing issues: Flashing around chimneys, vents, and skylights is inspected for rusting, detachment, or cracks that could allow water seepage.
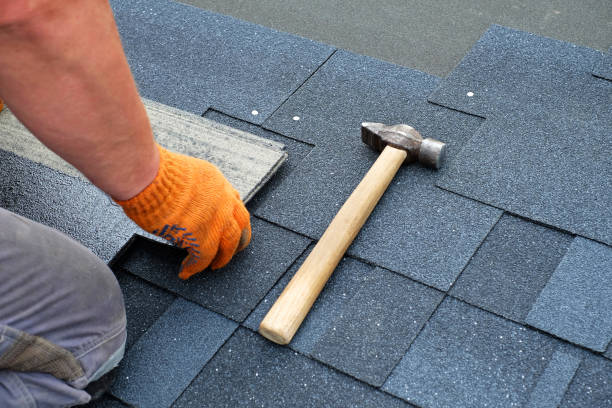
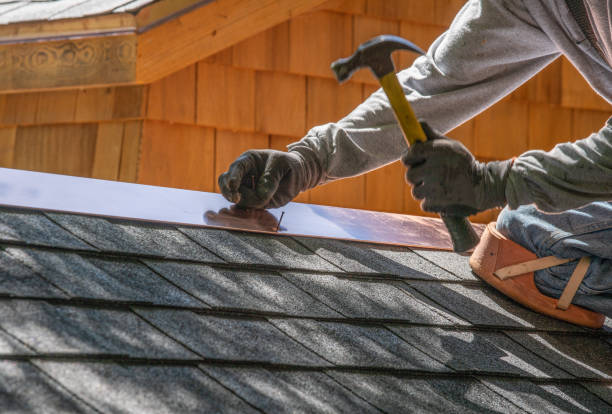
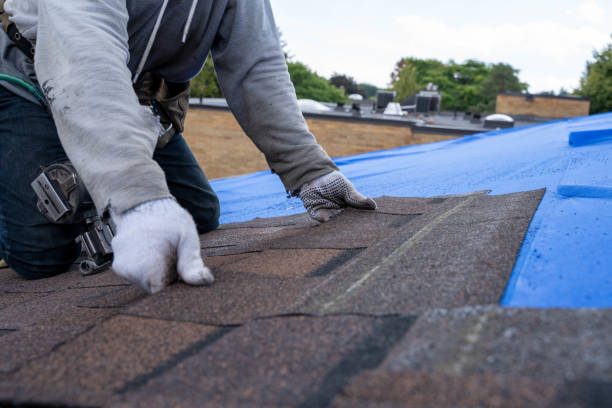
Detailed Surface Assessment
- Checking shingle durability: Experts test shingles for brittleness or looseness caused by prolonged exposure to weather elements.
- Inspecting seals around penetrations: Areas where vents, pipes, and HVAC systems penetrate the roof are carefully checked to ensure watertight seals.
- Searching for soft spots: Walking across different sections helps detect soft spots in the decking caused by moisture infiltration.
- Examining joints and valleys: Damage in these critical areas can lead to leaks if not addressed promptly.
Assessment of Internal Structures
- Attic spaces for water stains on beams or insulation that could signal leaks.
- Ceilings and walls, looking for discoloration indicating moisture intrusion.
- Ventilation systems, ensuring proper airflow to prevent mold growth and premature aging of roofing materials.
Documentation Through Technology
| Tool/Technology | Purpose |
| Drone cameras | Provide aerial views of hard-to-reach areas without risking safety. |
| Infrared thermography | Detects heat loss patterns associated with insulation gaps or leaks. |
| Moisture meters | Pinpoints hidden dampness within roofing materials. |
Contractors often provide clients with digital reports featuring photos and data collected through these technologies.
Creating an Action Plan
- Replacing damaged shingles or flashing.
- Reinforcing weak structural components.
- Waterproofing vulnerable seams and joints.
A well-documented inspection ensures property owners have all the information needed to make informed decisions about maintaining their roofs effectively over time.
Steps a Roofing Contractor St Paul MN Takes to Inspect Roof Conditions for Damage
Professional roofing contractors follow a systematic approach to assess the condition of your roof and identify potential damage. These steps ensure that no issue, big or small, goes unnoticed during the inspection process. Below is a detailed breakdown of the steps involved in a roof inspection by experts.
Preliminary Assessment and Client Consultation
- Gathering Information: Contractors often begin by speaking with the homeowner to understand any visible issues or concerns, such as leaks, drafts, or unusual noises from the roof.
- Reviewing Roof History: Understanding the age of the roof, previous repairs, and material type helps professionals tailor their assessment techniques.
- Visual Curbside Inspection: Before climbing onto the roof, contractors perform an exterior observation from ground level to check for obvious signs such as sagging areas, missing shingles, or debris accumulation.
Detailed Structural Inspection
The structural integrity of a roof is critical for its overall performance. During this stage:
– Professionals inspect for signs of sagging or uneven surfaces that might indicate compromised rafters or decking.
– The chimney, vents, and other protrusions are checked to ensure they are properly sealed and aligned.
– Contractors evaluate soffits and fascia boards for rot or damage caused by moisture infiltration.
Surface Condition Examination
Roof surfaces endure constant exposure to weather elements. To assess their condition:
– Shingle Analysis: Inspectors look for curled, cracked, warped, or missing shingles that reduce durability.
– Membrane Inspection (for flat roofs): They check for punctures or bubbles in membranes commonly used on commercial properties.
– Flashing Evaluation: Flashings around chimneys, vents, skylights, and valleys are assessed for rusted areas or improper sealing that could lead to leaks.
Identifying Water Damage Indicators
| Signs on Exterior | Signs in Interior |
| Water stains along siding | Dark spots on ceilings |
| Mold/mildew growth near gutters | Peeling paint on walls |
| Blocked gutters causing overflow | Damp insulation in attic |
Inspectors also use moisture meters during this phase if water intrusion is suspected but not visibly evident.
Checking Ventilation Systems and Attic Spaces
Proper ventilation is essential to prevent heat buildup and moisture retention under the roof covering. Professionals examine:
1. Attic insulation levels to ensure they meet energy efficiency standards. 2. Airflow systems such as ridge vents or gable vents. 3. Moisture content within attic spaces using specialized meters.
Advanced Tools Used by Modern Roofers
Many modern contractors incorporate advanced technologies into their inspection processes: – Drones provide aerial views of hard-to-reach areas without additional risk. – Infrared Cameras help locate hidden leaks by detecting temperature variations caused by trapped moisture. – Roof Scanners allow inspectors to identify weakened areas without dismantling existing structures.
These tools enhance precision while saving time compared to traditional methods.
By following this comprehensive process during inspections, professional roofing contractors ensure that homeowners receive an accurate diagnosis of their roof’s condition along with recommended solutions tailored to address specific concerns effectively.
How Modern Technology is Revolutionizing Roofing Services St Paul MN
Advancements in technology have transformed the roofing industry, making inspections and repairs more efficient, accurate, and safer. Roofing contractors now leverage innovative tools and techniques to streamline processes, reduce costs, and ensure long-lasting results. Below is an exploration of how modern technology is reshaping roof inspections and repairs.
Drone Technology for Safer Inspections
Roof inspections traditionally required contractors to climb atop roofs, posing safety risks and challenges when inspecting steep or damaged surfaces. With drone technology, professionals can assess roof conditions safely from the ground.
Key benefits of drones include: – High-resolution imagery: Captures detailed aerial views of roofs to identify cracks, leaks, or structural issues. – Access to hard-to-reach areas: Inspects areas that are otherwise difficult or dangerous for humans to evaluate. – Time efficiency: Speeds up the inspection process by covering large areas quickly.
Drones not only enhance contractor safety but also improve accuracy in identifying potential problems.
Infrared Scanning for Detecting Hidden Damage
Infrared (thermal) imaging is another cutting-edge tool used by roofing experts. This non-invasive technology identifies temperature variations on a roof’s surface to detect hidden damage.
How infrared scanning helps: – Moisture detection: Locates water trapped under roofing materials that may not be visible to the naked eye. – Energy efficiency analysis: Identifies insulation issues or heat leaks. – Prevention of further damage: Allows early detection of underlying problems before they escalate into costly repairs.
Thermal imaging stands out as a reliable method for diagnosing issues without dismantling parts of the roof unnecessarily.
Advanced Roofing Materials with Smart Sensors
Modern roofing materials equipped with smart sensors are becoming increasingly popular. These sensors provide real-time data that allows homeowners and contractors to monitor roof health over time.
Features of smart roofing materials: – Leak detection systems: Notify homeowners immediately if moisture levels rise beyond normal levels. – Durability tracking: Measure wear-and-tear over time to predict when maintenance will become necessary. – Weather monitoring capabilities: Adapt roofing performance based on changing environmental conditions like heavy rain or extreme heat.
Integrating smart materials into roofs ensures better performance management while reducing long-term repair costs.
Software Solutions for Precision Planning
Contractors now use specialized software designed for project planning and cost estimation. These programs streamline every stage of a roof repair or replacement project by offering precise calculations and visual tools.
Benefits of using software solutions: 1. Accurate measurements through satellite imagery or 3D modeling. 2. Detailed cost breakdowns based on material choices, labor needs, and additional factors. 3. Visual representations that help clients understand proposed solutions better before work begins.
Such software enhances communication between contractors and clients while ensuring transparency throughout the process.
Robotics in Roof Repairs
In addition to inspection tools, robotics are beginning to play a role in actual roof repair processes. Automated systems can apply sealants, fix shingles, or clean gutters without requiring human intervention in hazardous conditions. This minimizes risks while maintaining high-quality results through precision work.
The Future of Roofing Technology
As technological advancements continue evolving, more innovations will likely emerge in the roofing industry—further improving safety standards, reducing costs, and extending the lifespan of residential and commercial roofs alike. Investing in these technologies today allows both contractors and property owners to reap long-term benefits tomorrow.
By embracing tools such as drones, thermal imaging devices, smart systems, specialized software solutions—and even robots—the industry continues progressing toward safer practices with higher-quality outcomes for all stakeholders involved in roofing projects.
How Modern Technology is Revolutionizing Roof Inspections and Repairs
The roofing industry has seen remarkable advancements in recent years, with modern technology playing a pivotal role in transforming how roof inspections and repairs are conducted. These innovations not only enhance the accuracy of assessments but also improve safety and efficiency for both contractors and homeowners.
Key Technologies Transforming Roof Inspections
- Drones for Roof Inspections
Drones equipped with high-resolution cameras and thermal imaging sensors have become an invaluable tool for roofing professionals. They allow contractors to: - Capture detailed aerial views of the roof.
- Identify cracks, leaks, or missing shingles from a safe distance.
- Access hard-to-reach areas without requiring ladders or scaffolding.
- Thermal Imaging Devices
Thermal imaging helps detect hidden water damage or insulation issues by identifying temperature variations across the roof’s surface. This non-invasive method enables experts to pinpoint: - Moisture trapped under shingles or decking.
- Heat loss areas caused by poor insulation.
- Potential structural vulnerabilities.
- AI-Powered Roofing Software
Artificial intelligence is being integrated into roofing software to streamline inspections, reporting, and repair planning. These programs can: - Analyze drone footage to generate accurate damage reports.
- Predict the lifespan of roofing materials based on current conditions.
- Provide cost estimates for repairs or replacements.
- Moisture Detection Sensors
Advanced sensors embedded in roofing systems can monitor moisture levels over time. When connected to smart home systems, they provide real-time alerts about potential leaks before they become significant problems.
Benefits of Technology-Driven Roof Repairs
- Precision Repairs: With 3D modeling tools, contractors can map out repairs down to the smallest detail, ensuring materials are used efficiently with minimal waste.
- Improved Safety: Robotic equipment allows workers to perform some tasks remotely, reducing exposure to hazardous conditions like steep slopes or extreme weather.
- Faster Turnaround Times: Automated tools expedite material cutting and installation processes, enabling quicker project completion without compromising quality.
A Comparison: Traditional Methods vs Modern Technology
| Aspect | Traditional Methods | Modern Technology |
| Inspection Time | Hours (manual inspection) | Minutes (via drones/thermal imaging) |
| Safety Risks | High (climbing roofs directly) | Low (use of remote devices) |
| Accuracy | Subjective (based on visual checks) | Objective (data-driven insights) |
| Cost Efficiency | Moderate | High (long-term savings through early detection) |
Challenges in Adopting Modern Technologies
- Initial Investment Costs: Drones, thermal cameras, and AI-powered software require significant upfront investment that smaller businesses may find difficult to afford.
- Training Requirements: To use these tools effectively, contractors must undergo specialized training—a process that can be time-consuming initially.
- Compatibility Concerns: Not all homes are suitable for high-tech inspections due to factors such as roof design complexity or material limitations.
The Future of Roofing
As technology continues evolving, we expect even more sophisticated solutions tailored specifically for roofing needs. For instance:
– Augmented reality could enable virtual walkthroughs where clients visualize proposed changes before repairs begin.
– Self-healing materials may replace traditional shingles, reducing maintenance costs over time.
These advancements promise not only greater convenience but also improved long-term durability for homeowners investing in professional roofing services today.
Overcoming Common Challenges in Comprehensive Roof Assessments
Effective roof assessments are critical to maintaining the structural integrity of any building, but they often come with various challenges. Professional roofing contractors must address these challenges to provide accurate evaluations and recommendations. Below, we’ll explore some common obstacles encountered during roof inspections and how experts overcome them.
Accessing Hard-to-Reach Areas
One of the most significant challenges in roof assessments is gaining access to difficult-to-reach spots. Roofs with steep slopes, high elevations, or intricate designs often make physical inspections more dangerous and time-consuming.
How Professionals Address This:
– Safety Equipment: Use of harnesses, scaffolding, and ladders ensures that technicians can safely reach all parts of the roof.
– Drones: Modern drone technology enables aerial views of challenging areas without risking personal safety.
– Telescopic Cameras: Extending inspection tools equipped with high-resolution cameras helps survey areas that would otherwise require extensive setup or risk.
Identifying Hidden Damage
Not all damage is immediately visible on the surface of a roof. Problems such as leaks, internal water damage, or insulation issues may remain undetected without thorough testing.
Solutions for Hidden Damage Detection:
– Moisture meters are used to detect water trapped beneath roofing materials.
– Infrared thermography identifies temperature variations that signal potential insulation gaps or hidden moisture.
– Core sampling allows for an in-depth analysis of the roof’s layers to uncover underlying issues.
Dealing with Weather Constraints
Weather conditions can significantly hinder comprehensive roof assessments. Rainy days make roofs slippery and dangerous to navigate, while snowfall may obscure signs of damage altogether.
Mitigation Strategies:
– Schedule inspections during favorable weather conditions whenever possible.
– Use drones or remote technology during adverse weather for initial surveys until conditions improve for manual inspection. – Document past weather patterns to predict potential wear-and-tear areas based on environmental exposure.
Differentiating Between Cosmetic vs Structural Issues
It can be challenging for non-experts to distinguish between cosmetic flaws (like minor discoloration) and serious structural concerns that compromise safety and longevity.
Professional Approach:
Roofing contractors rely on years of experience and specialized training:
1. Evaluate age-related wear versus impact damage (e.g., from hail or debris).
2. Review installation techniques and materials used to identify poor craftsmanship versus natural deterioration. 3. Conduct structural load testing if there’s doubt about a roof’s performance capabilities over time.
Navigating Budgetary Constraints
Budget limitations are a common challenge when recommending repairs after an assessment is complete. Property owners may not always have immediate resources available for comprehensive fixes.
Problem-Solving Tactics Used by Roofing Experts:
1. Prioritize repairs based on urgency by focusing first on issues that pose safety risks or lead to further damage over time (e.g., active leaks).
2. Provide homeowners with detailed repair plans outlining short-term fixes versus long-term investments so they can make informed decisions within their budget constraints.
3. Suggest financing options or phased repairs when appropriate to ease financial strain.
| Challenge | Solution | Tools/Strategies Used |
| Accessing hard-to-reach areas | Utilize drones, telescopic cameras, harnesses | Drones; telescopic inspection tools |
| Detecting hidden damage | Employ moisture meters, thermal imaging | Infrared thermography; core sampling |
| Weather constraints | Schedule around weather patterns; use remote tech | Drones; contingency scheduling |
| Cosmetic vs structural issues | Focus on training/experience; perform load testing | Inspection expertise; specialized tools |
| Budget-related barriers | Offer phased plans, prioritize urgent repairs | Repair timelines; financing options |
Comprehensive roof assessments become smoother when professionals proactively address these challenges using advanced tools, proper planning strategies, and clear communication with clients about realistic expectations and solutions. By overcoming these obstacles effectively, contractors protect both the property’s value and its occupants’ safety long term.
Evaluating Costs and Budget Planning for Effective Roof Repairs
When it comes to roof repairs, understanding the associated costs and planning a realistic budget is a critical step. Proper budgeting ensures that the repair process is smooth and prevents unexpected financial strains. Below is a comprehensive guide to evaluating costs and creating an effective budget for roof repairs.
Factors Influencing Roof Repair Costs
- Roof Size: Larger roofs require more materials, labor, and time, increasing the overall cost.
- Type of Roofing Material: Asphalt shingles, metal roofing, slate tiles, or other materials vary in price. For instance:
| Material Type | Approximate Cost per Square Foot (Installed) |
|——————|——————————————–|
| Asphalt Shingles | $3.50 – $5.50 |
| Metal Roofing | $7 – $14 |
| Slate Tiles | $10 – $25 | - Extent of Damage: Minor damage, like replacing a few shingles, will cost less compared to repairing structural issues or water-damaged areas.
- Roof Pitch and Accessibility: Steeper roofs or those with limited access may require specialized equipment or more labor effort, increasing costs.
- Local Labor Rates: Labor pricing varies by location—urban areas tend to have higher rates due to demand.
Steps to Create an Effective Budget
- Get Professional Inspections: Always start with an inspection from a licensed roofing contractor. They can provide a detailed estimate based on their assessment of your roof’s condition.
- Request Multiple Quotes: Obtain quotes from at least three contractors to compare pricing and services offered.
- Permits: Check if local regulations require permits for certain types of roofing work.
- Disposal Fees: Removing old roofing materials often incurs waste disposal fees.
- Address safety concerns immediately (e.g., structural weaknesses).
- Plan lower-priority cosmetic fixes for later phases if necessary.
- Set Aside an Emergency Fund: It’s advisable to reserve about 10%-15% extra in your budget for unanticipated expenses during the project.
Cost-Saving Tips Without Compromising Quality
- Opt for durable yet affordable materials that provide long-term value (e.g., architectural shingles instead of luxury options like slate).
- Schedule seasonal inspections and maintenance regularly to prevent costly emergency repairs later on.
- Look into warranties offered by contractors or manufacturers—some may cover certain kinds of damage at no additional cost if issues arise within the coverage period.
Sample Budget Breakdown
| Expense Category | Estimated Cost Range |
| Inspection Fee | $100 – $300 |
| Materials | $1,500 – $2,500 |
| Labor | $2,000 – $3,500 |
| Permit Fees | $50 – $150 |
| Waste Disposal | $100 – $300 |
| Emergency Fund Reserve | ~10% of Total Costs |
With these figures in mind, you can plan effectively while ensuring all aspects of the repair process are accounted for.
By carefully evaluating costs upfront and adopting strategic budgeting practices, homeowners can address roofing issues promptly while avoiding unnecessary financial stress down the line.
- Understanding the Benefits of a Professional Roof Inspection with a St Paul MN Roofer
- How a St Paul MN Roofing Company Assesses Structural Damage to Your Roof
- Effective Solutions to Common Roofing Problems with a St Paul MN Roofer
- Key Signs You Need a Roofing Inspection from a Trusted Roofing Contractor St Paul MN
- Enhance Your Roof’s Longevity with a Trusted St Paul MN Roofing Company
- Identifying the Right Time to Call a St Paul MN Roofer for Roof Replacement